How to make a hexagonal costume for celebrating Eid
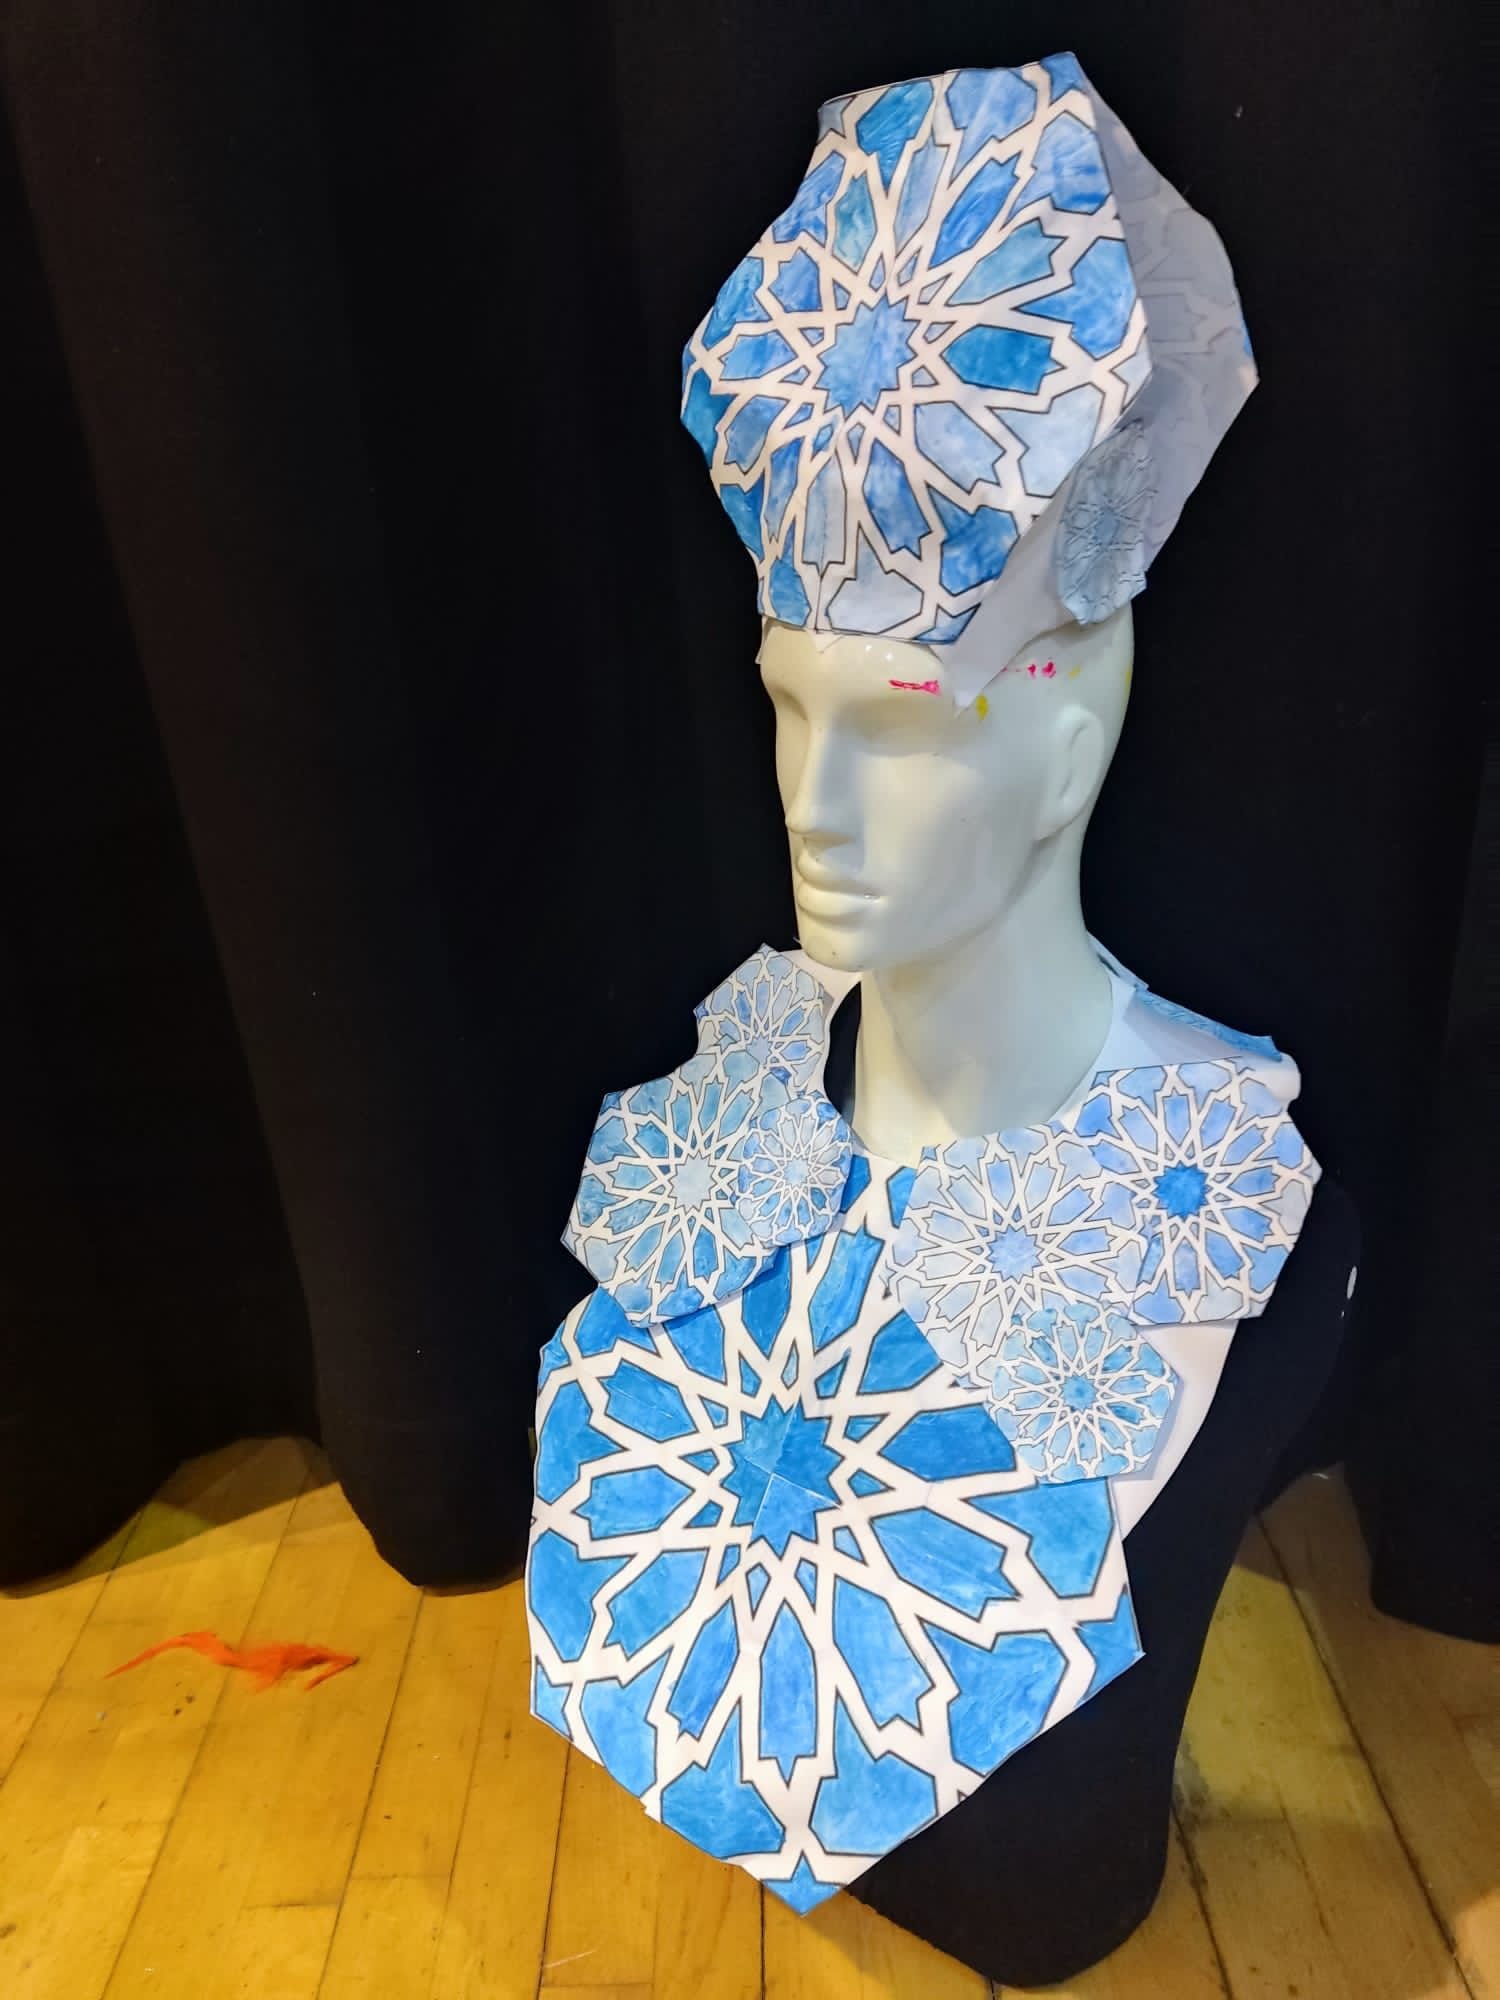
This blue and white costume is easy to make from paper, glue and paint and a great way for adults and children to get crafty for Eid. It has a really beautiful hexagonal design.


You will need
3 pieces of A4 paper
Scissors
Glue
Colouring pens, pencils or paint
Step 1 - Create your headdress base
The first step for all the designs is to create the headdress base. You can do this with two pieces of A4. The templates for the base are on pages 8 and 9 of the downloadable template - click button below to download. You will end up with 4 pieces in total for your base.
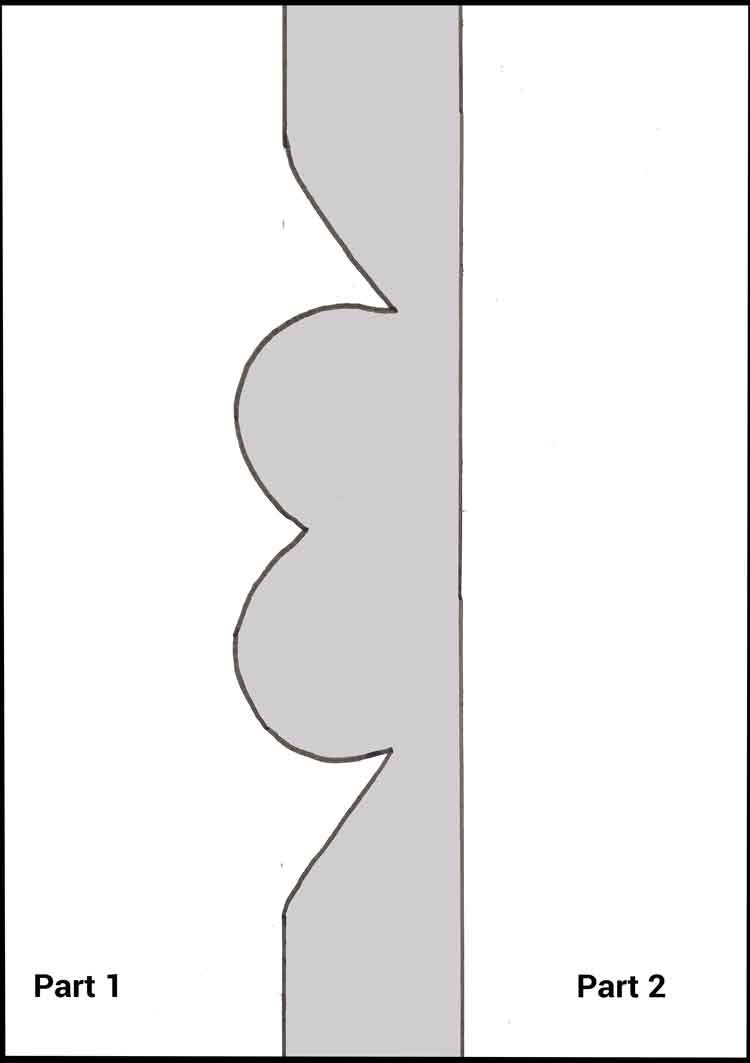
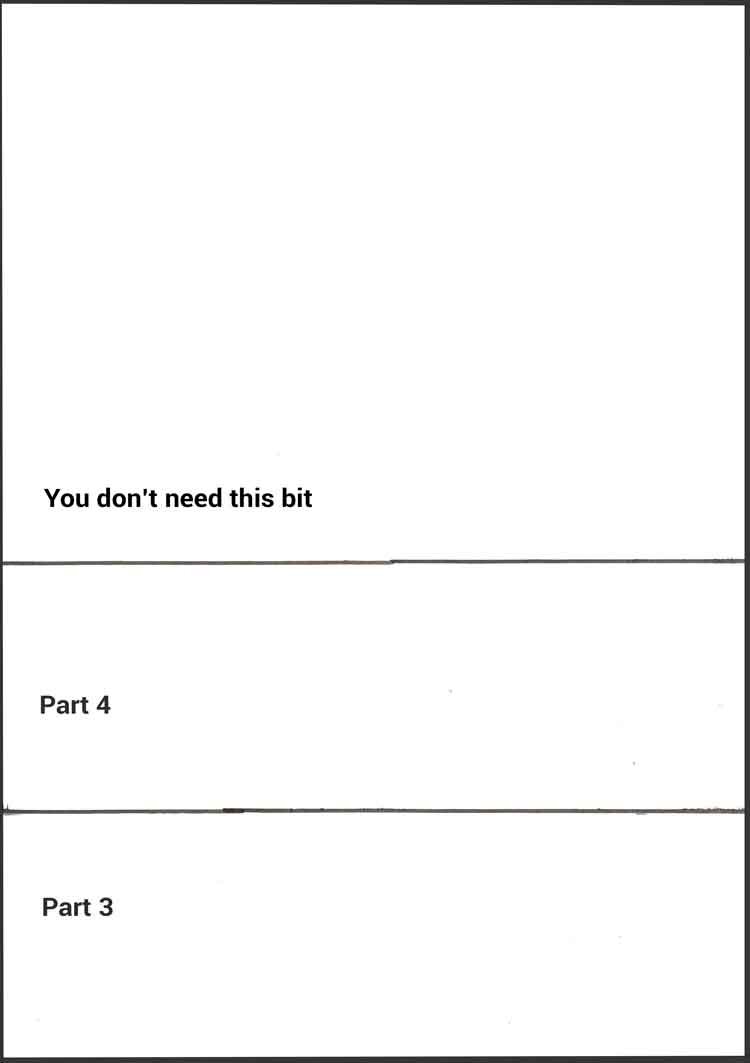
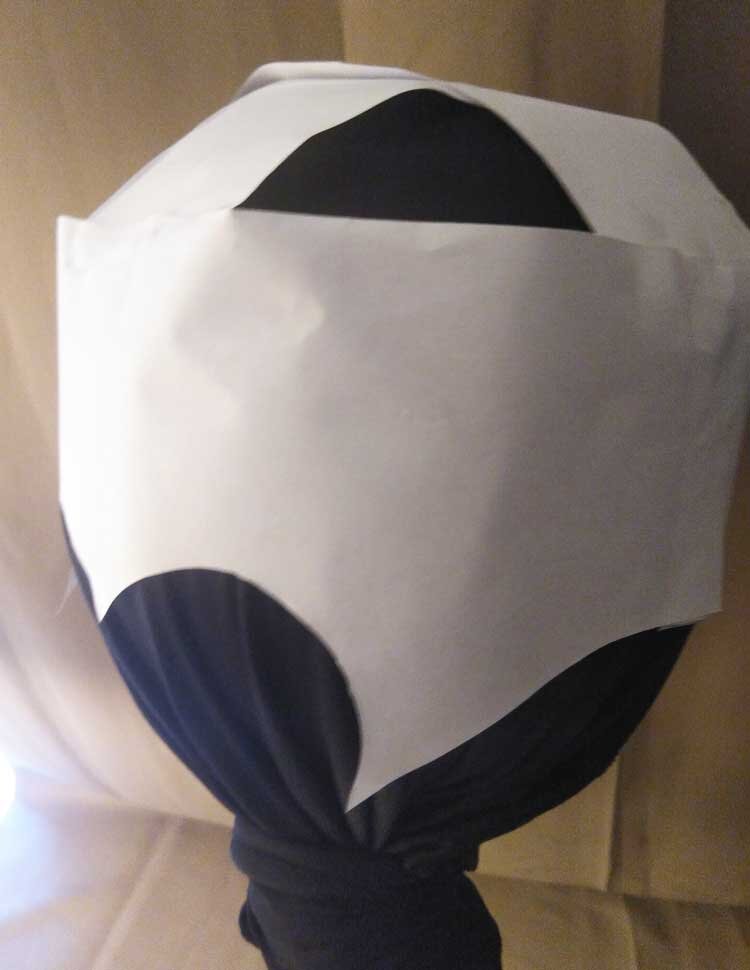
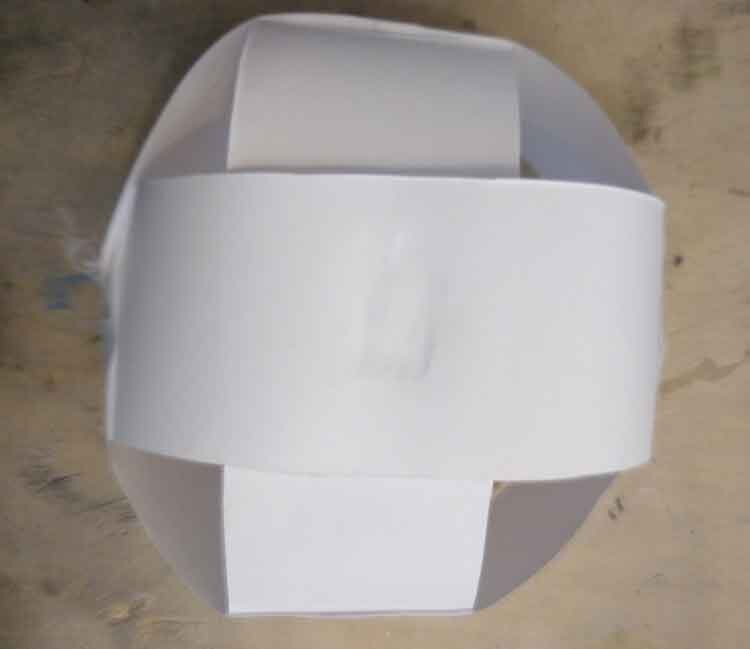
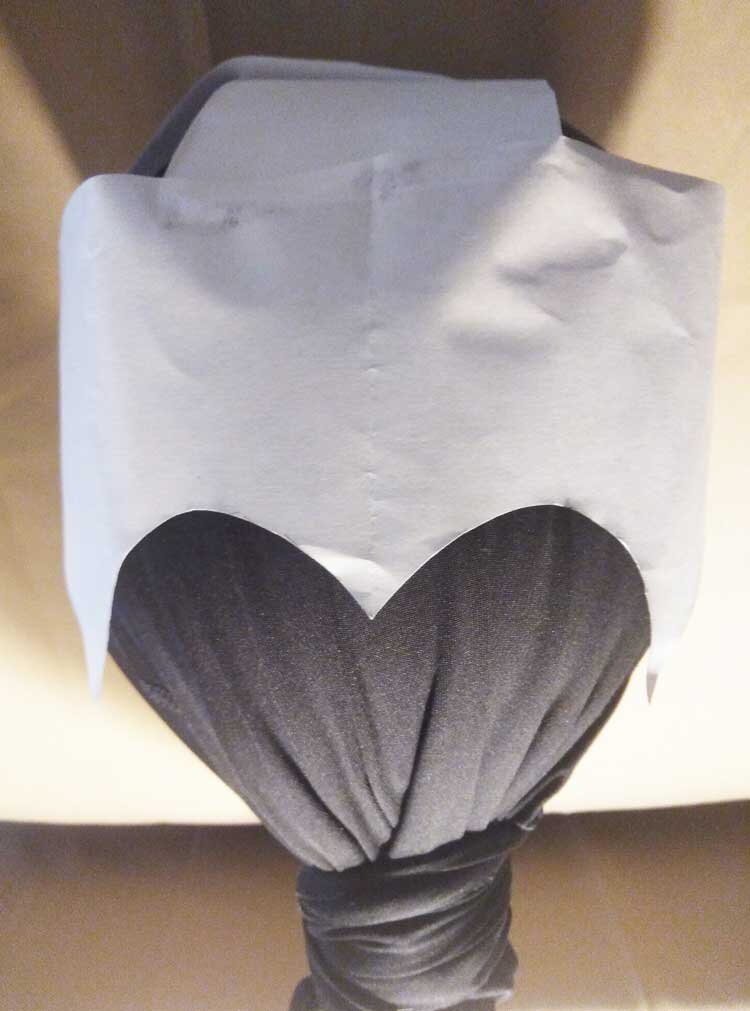
To put your base together you first take part 1, and stick one side of part 2 to it. Then measure around your head to stick the other end of part 2 to the other side of part 1. This forms a crown shape, where the top of heart shape will sit above your eyebrows. You then take part 3 and part 4 and glue them to the inside of your crown shape, so that one of them crosses over the other to form a top to your base like in the picture below.
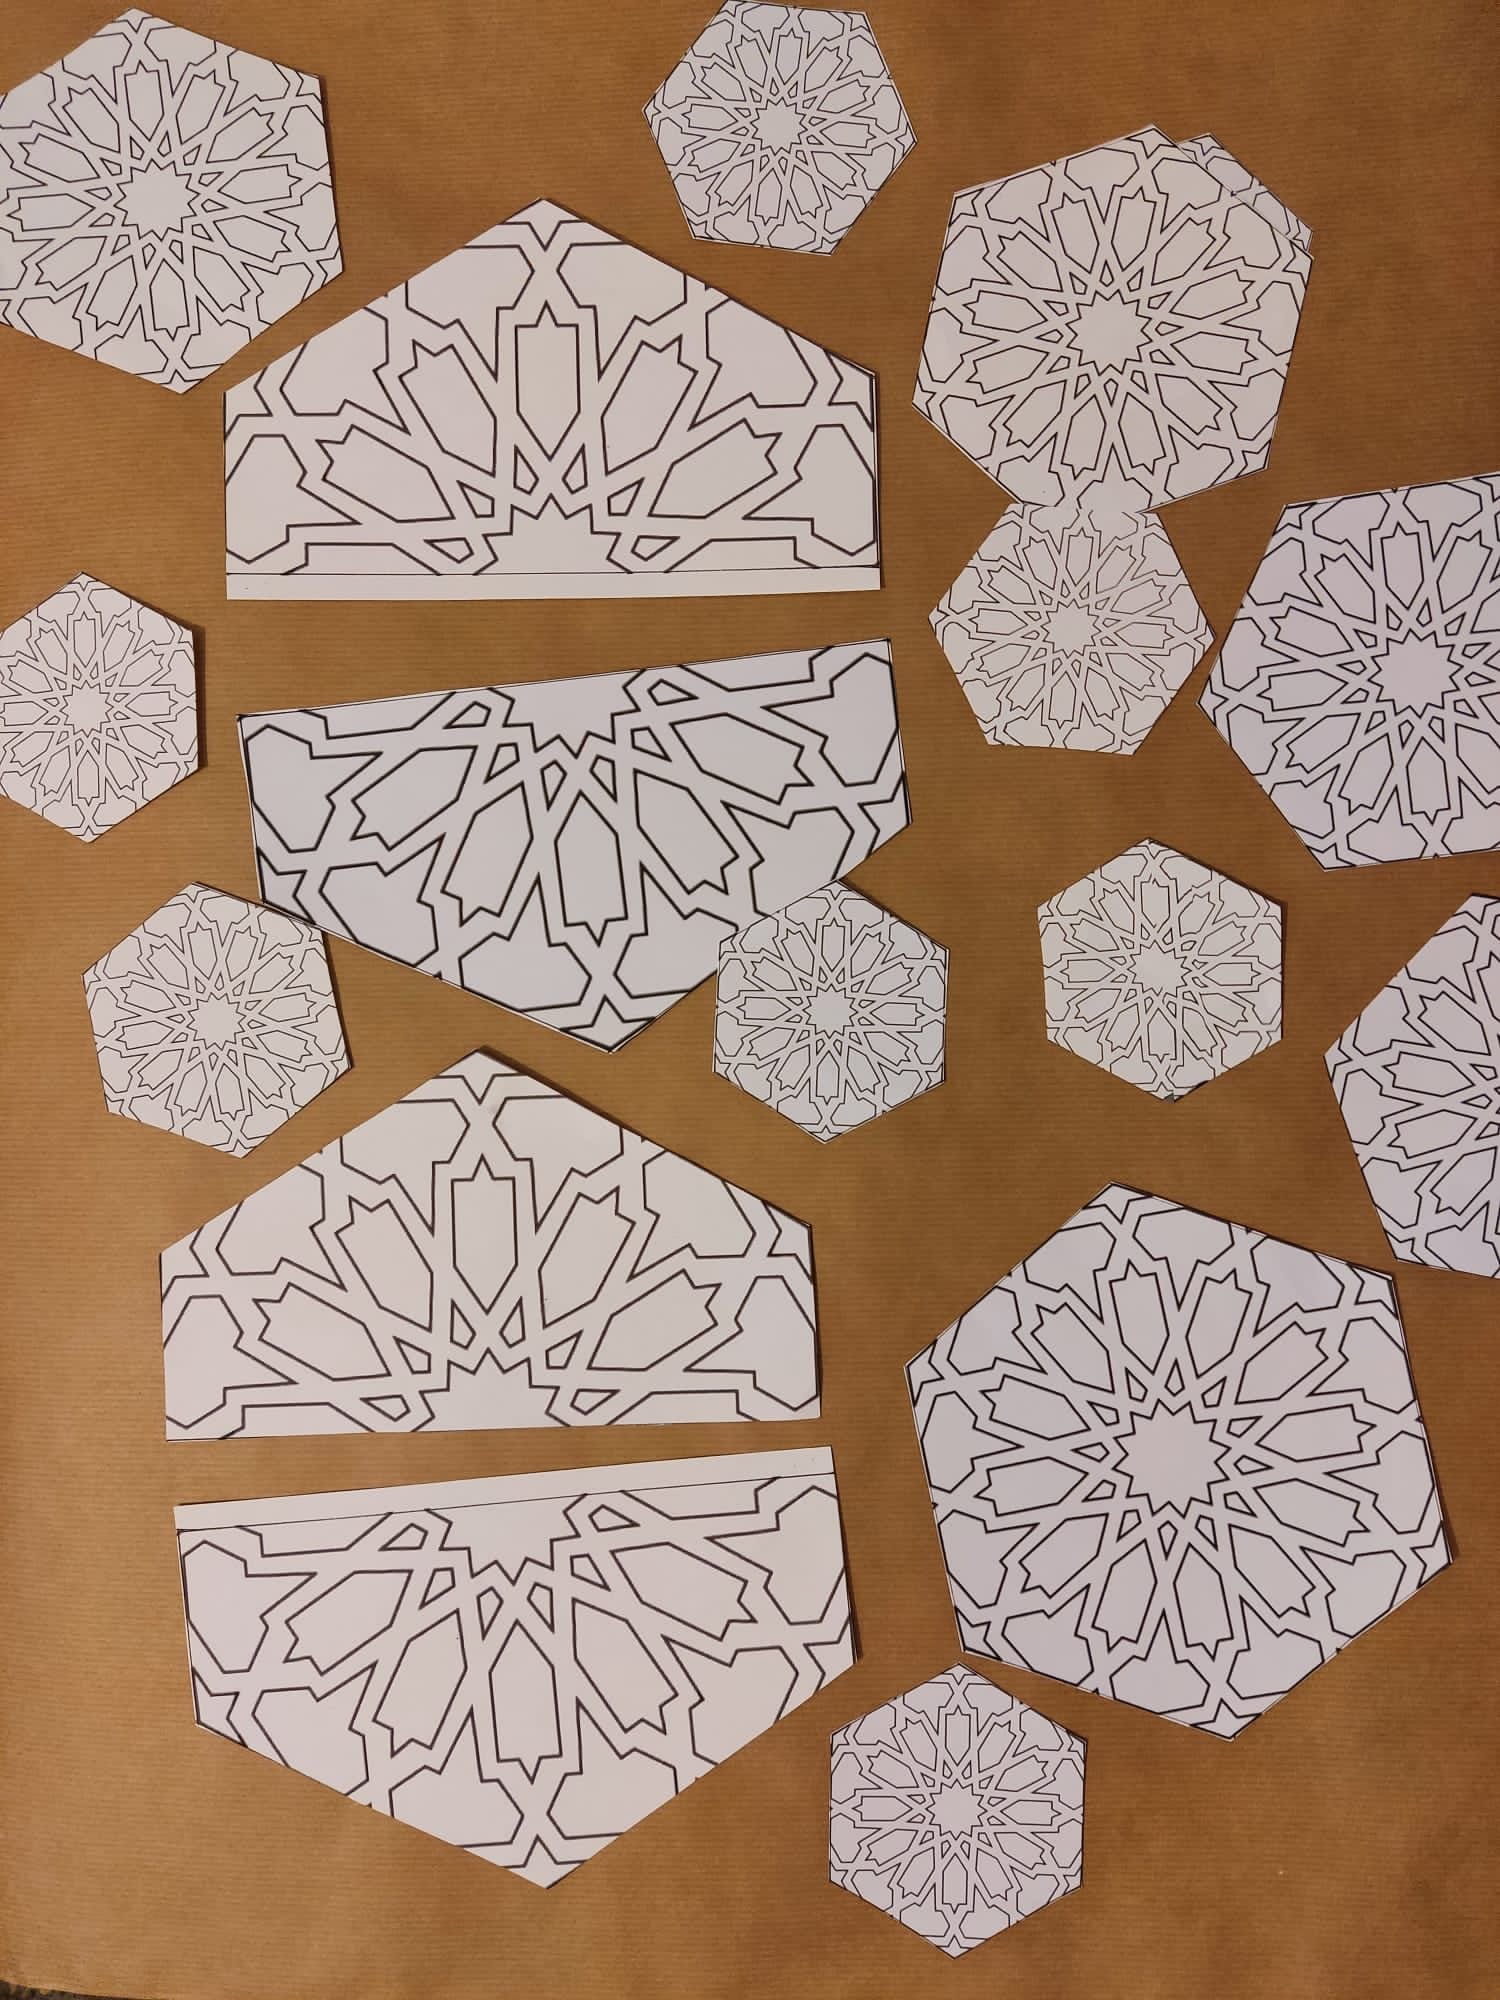
Step 2 - Print out your hexagonal pattern templates
If you haven't already, print out your templates (pages 14 onwards).
No printer? No problem! You can copy some of the designs or even make up your own EID celebration designs.
Step 3 - Decorate your headdress
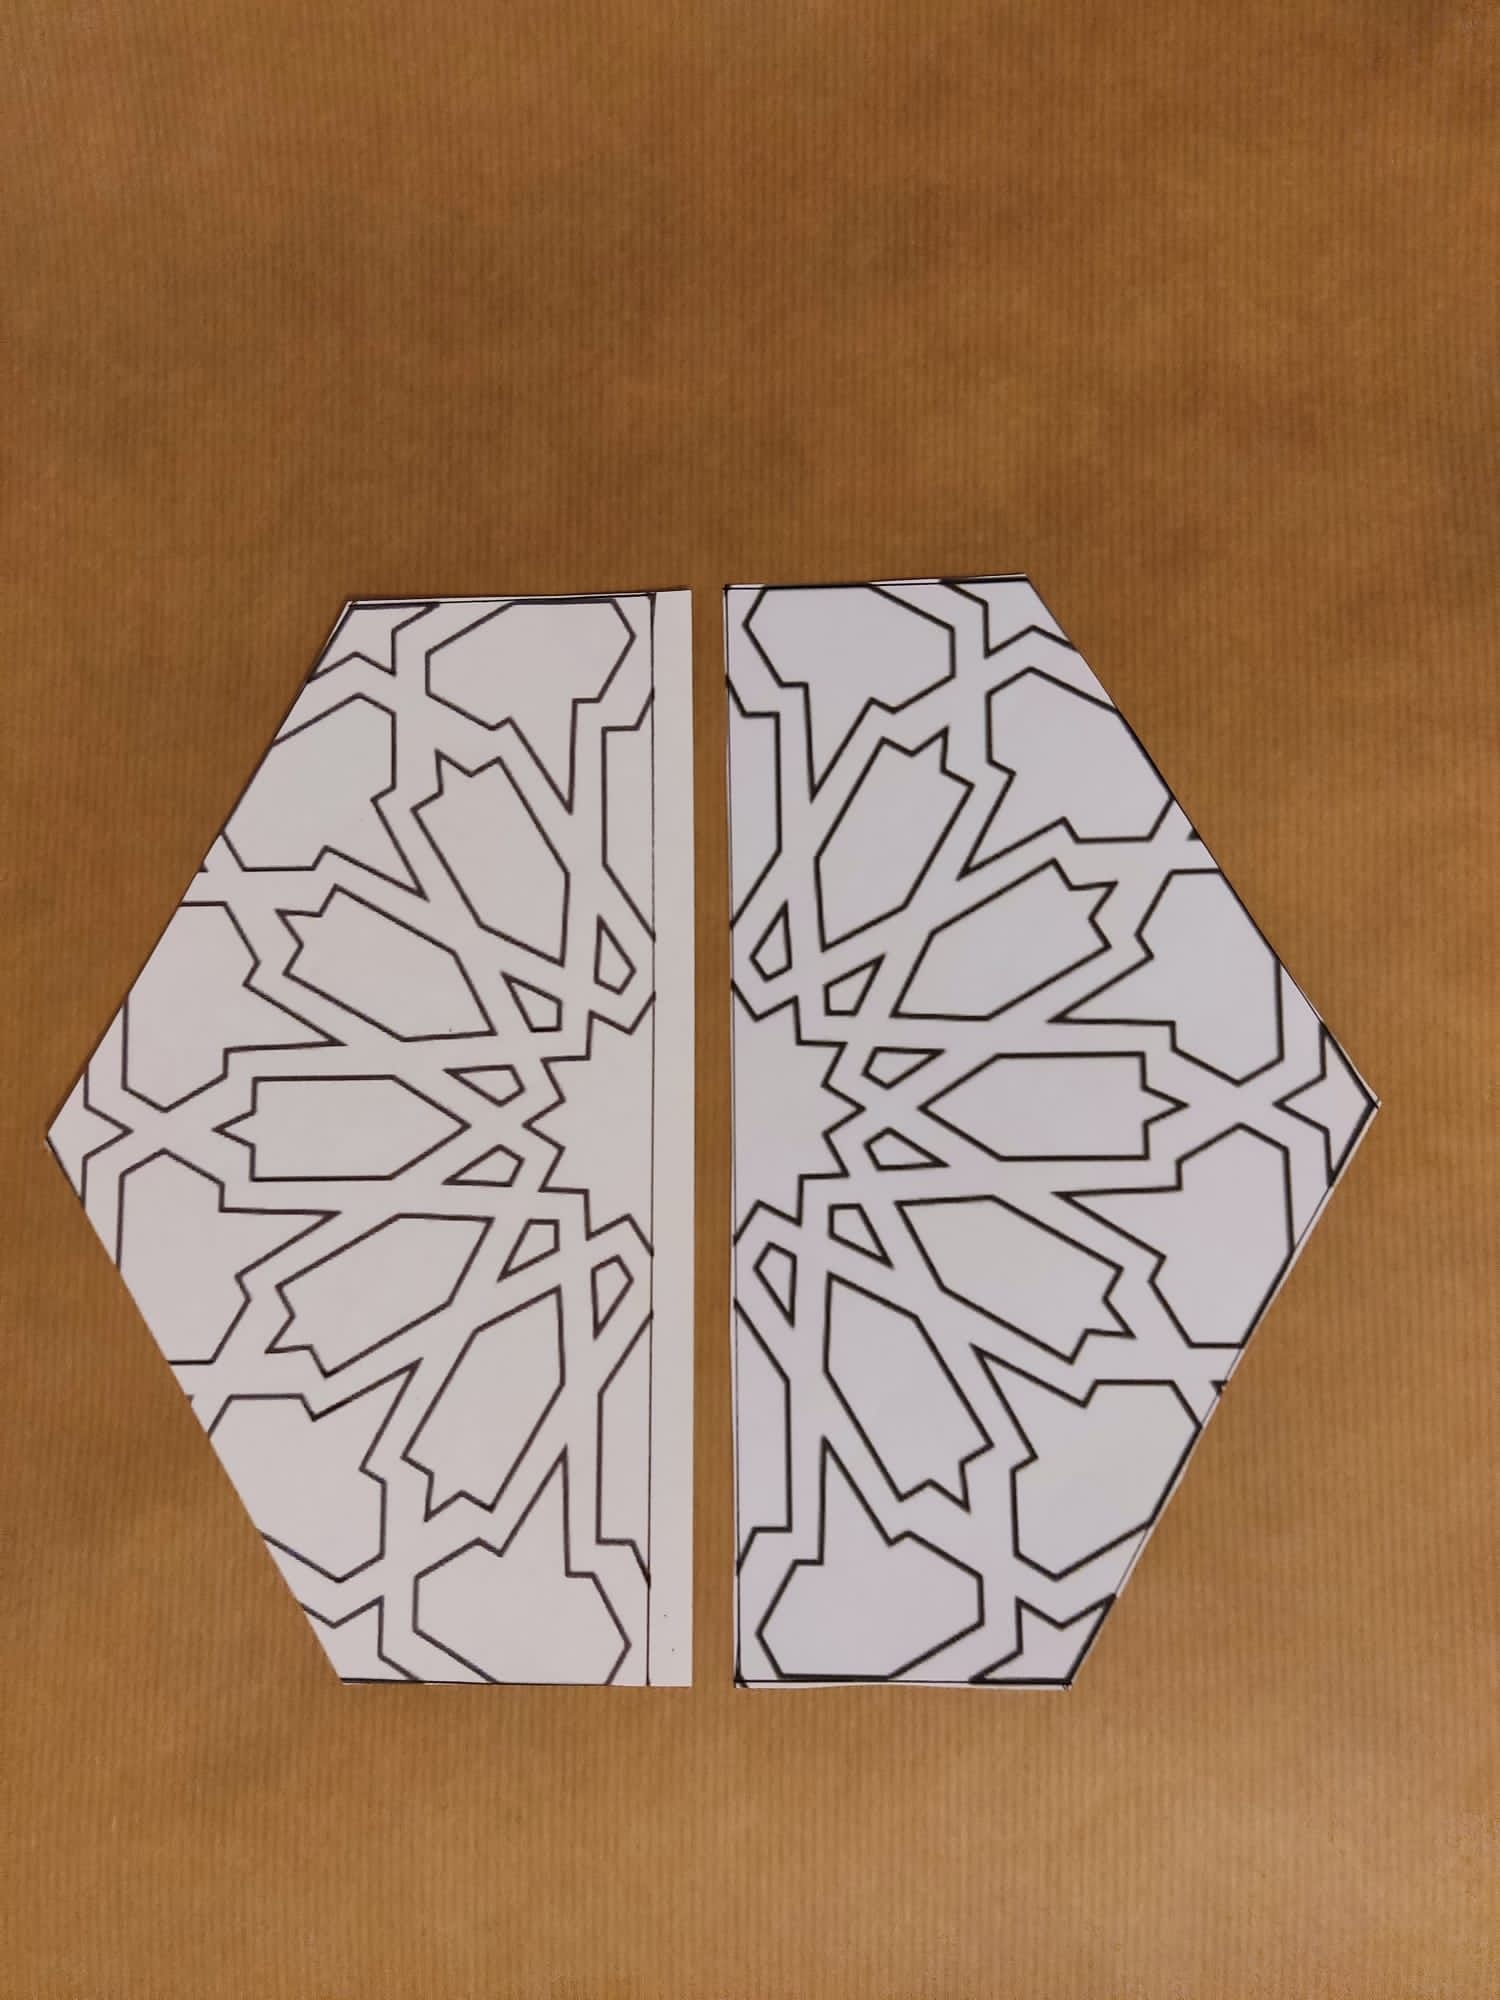
Now you can add all your decorative pieces to your base to make your headdress look really amazing. In our example we have put the big pattern at the front and back (made up from two matching peices) with smaller patterns each side, and we have painted them blue.
Fix your headdress base together
For the headdress your template will give you 4 pieces to glue together. You will glue parts 1 and 2 together to form a band around your head. The shaped piece will sit over your eyebrows.
You then glue parts 3 and 4 in a cross over the top of the base to form a hat shape. So one side of part 3 will be glued to the inside front of the band, the other side to the inside back of the band. Part 4 will go in the opposite direction, fixing to the two sides to form a cross shape on top.


Step 4 - Create a matching collar
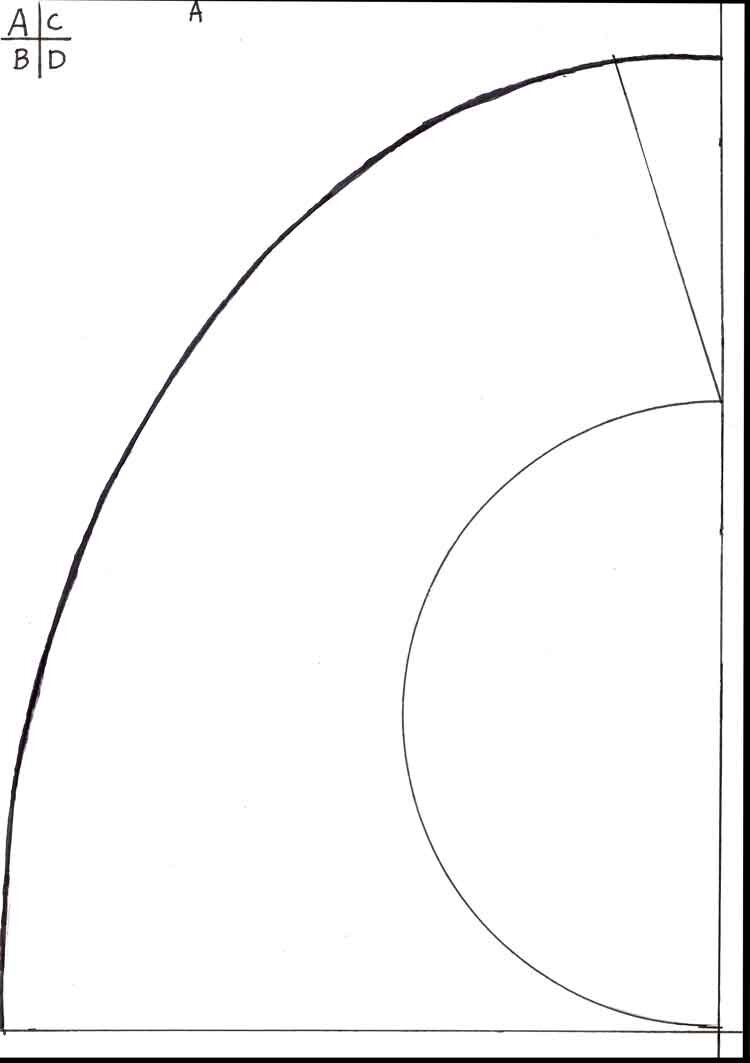
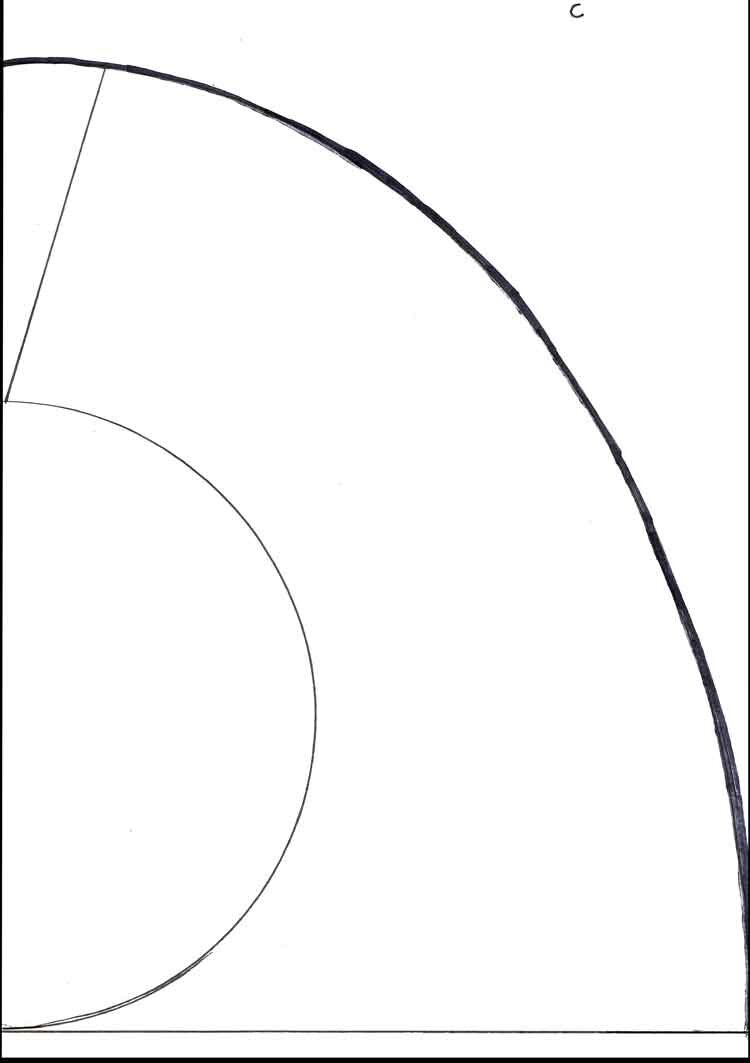
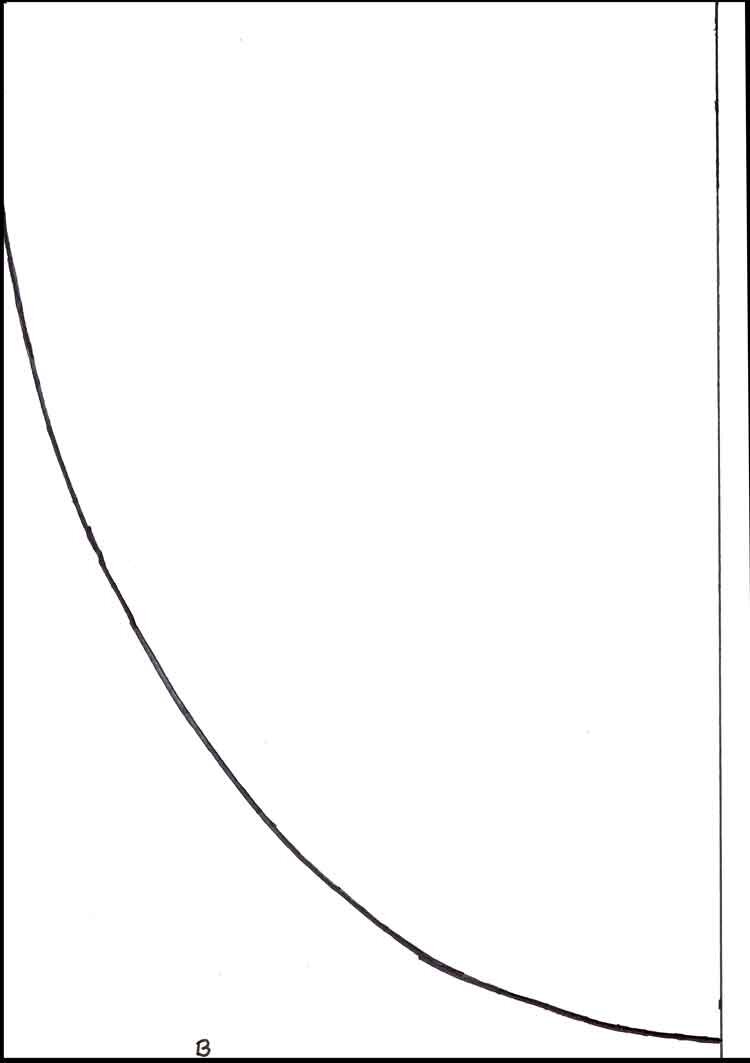
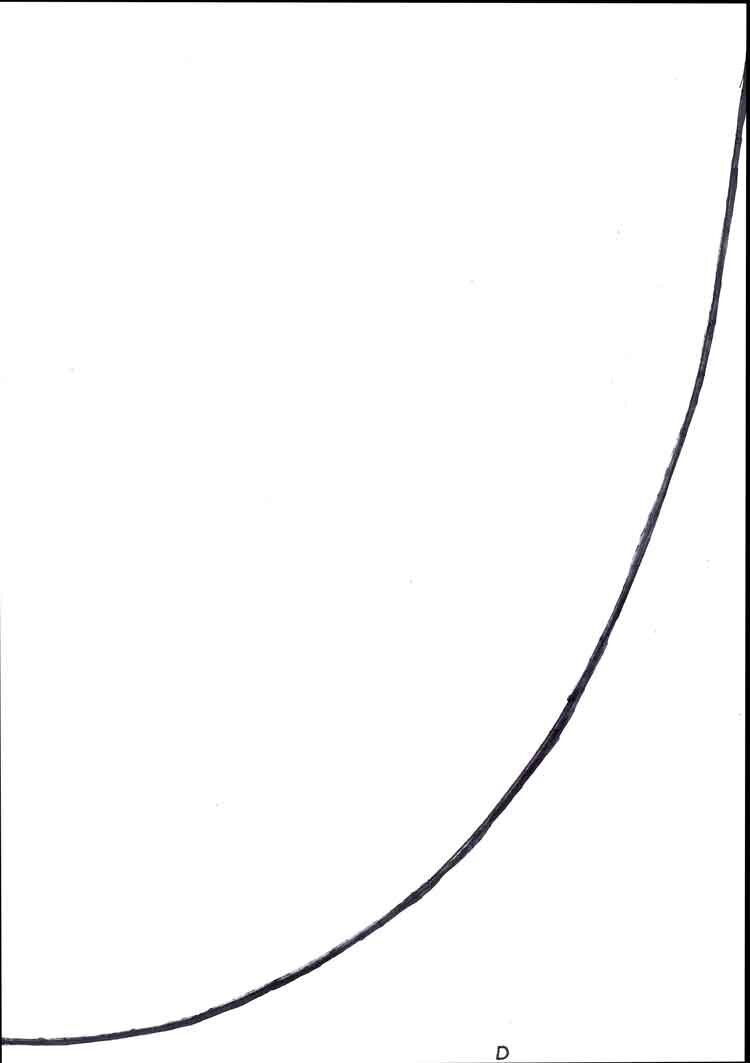
Print out the templates on pages 10-13 of the booklet. You will print out four pieces, or alternatively draw them on paper, cut them out and then clue each piece together. As you can see in the picture below, there are 4 shape - A, B, C and D. If you fix them together, by folding and using the tabs in the template, then you will end up with the correct shape!
Step 5 - Decorate your EID collar
The same patterns used for the headdress are used for the collar. You can print out and decorate a lot of these and then get as creative as you like sticking them to your collar base. The large hexagonal pattern you see in our example is made up from 4 quarter pieces you can find in the booklet.